
Harvesting root crops can be risky, but following simple safety steps ensures both your safety and the quality of your crops. Here’s what you need to know:
- Common Hazards: Injuries from equipment, physical strain, and fatigue are common. Use ergonomic tools, wear protective gear (like gloves and steel-toed boots), and share tasks to avoid overexertion.
- Best Tools: Ergonomic and long-handled tools like the EarthLifter make harvesting easier and safer.
- Harvesting Tips: Loosen soil first, use proper pulling techniques to avoid strain, and handle crops gently to maintain quality.
- Post-Harvest Soil Care: Add compost, plant cover crops, and avoid over-tilling to prepare for the next season.
- Storage: Store crops like carrots and potatoes in cool, moist conditions, and ensure proper ventilation to extend freshness.
How to Harvest Root Vegetables
Tools for Safe Harvesting
Using the right tools can reduce strain and protect your crops during harvest.
EarthLifter Tool: Features and Uses
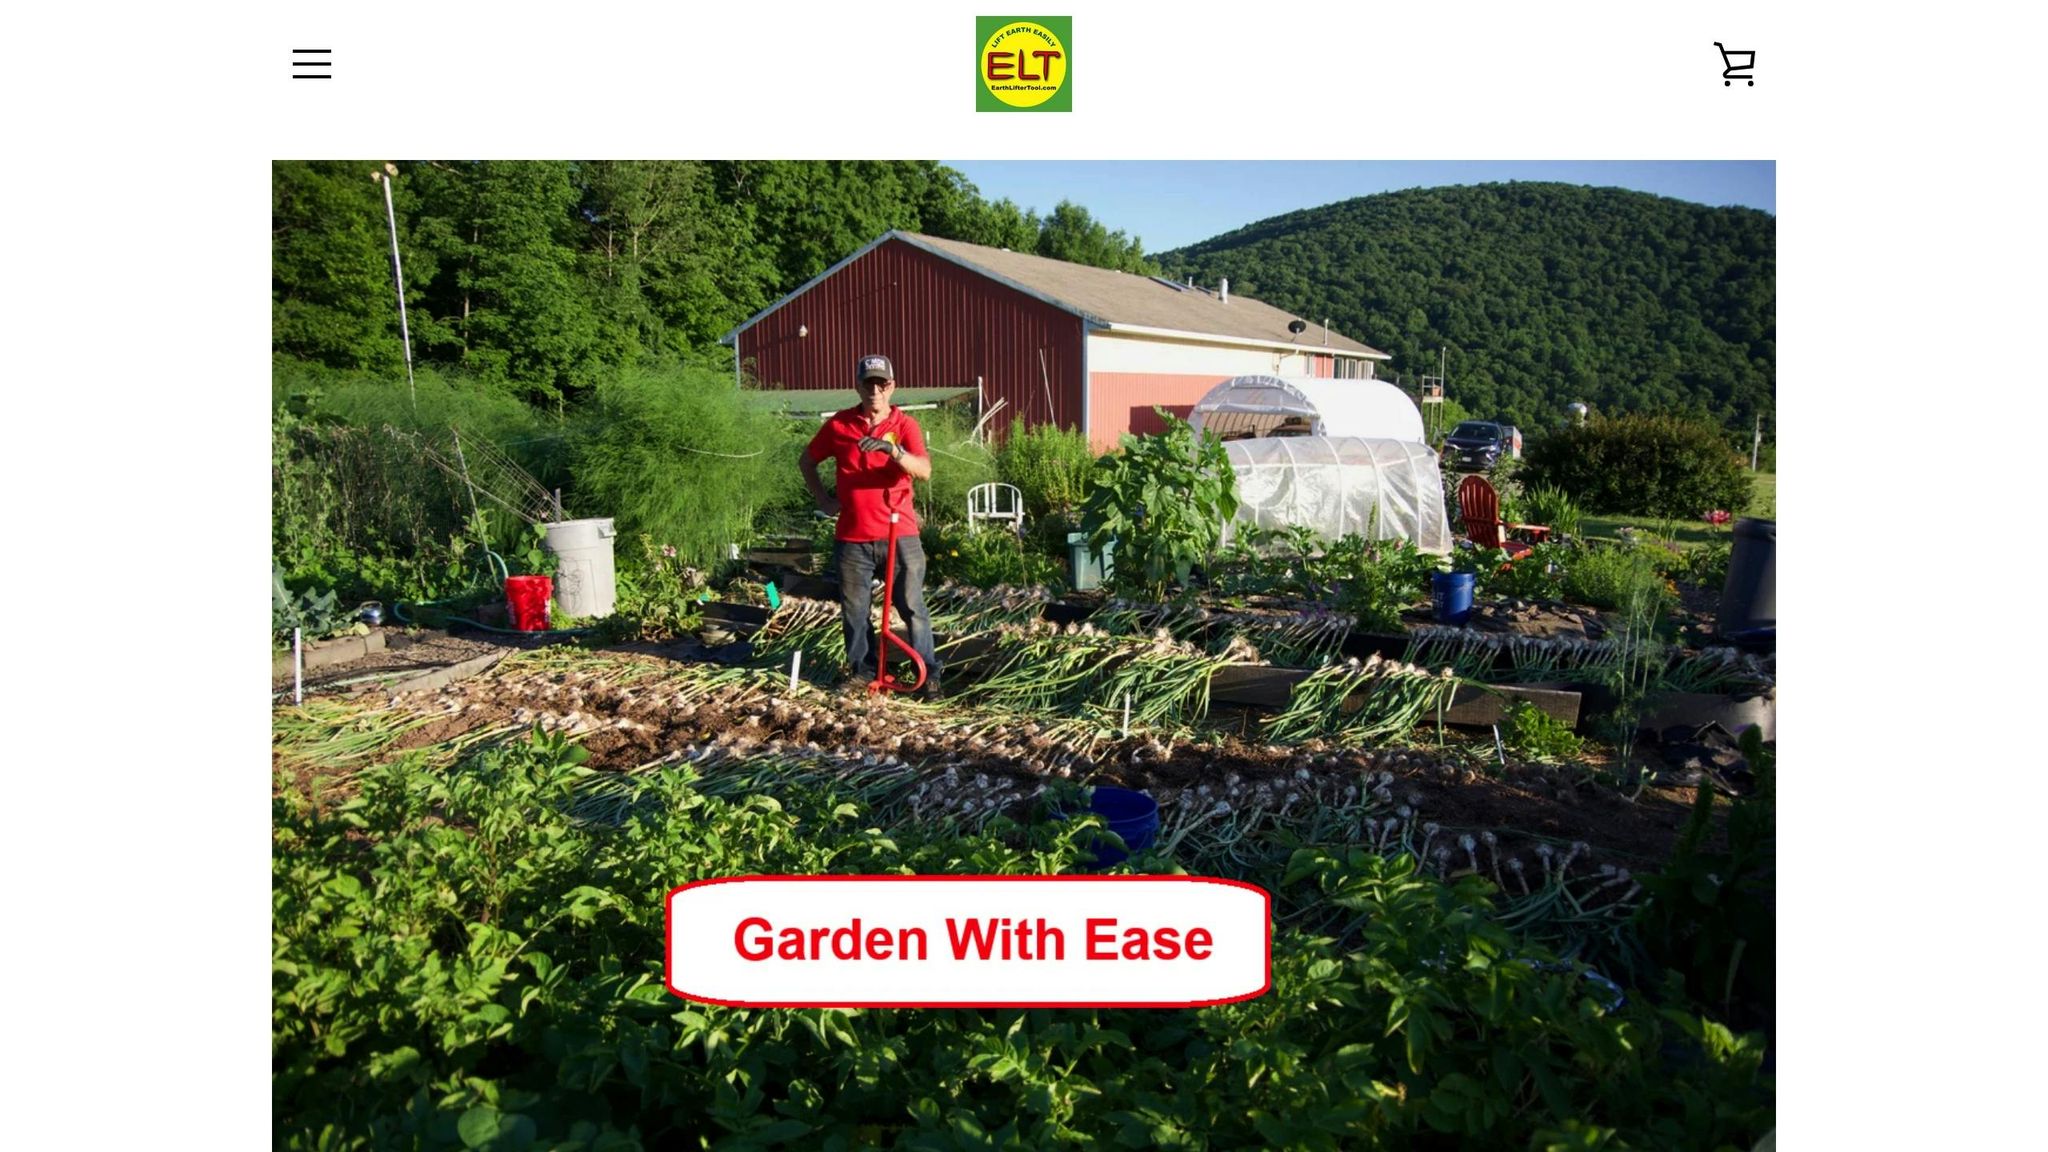
The EarthLifter Tool ($165) is designed to make root crop harvesting easier. Its 4:1 mechanical advantage means you can lift up to 80 pounds of crops using just 20 pounds of force. The tool’s patented "Rolling Fulcrum" design ensures controlled, gentle lifting, which helps protect delicate root systems.
"With the EarthLifter, on the other hand, you're pushing down instead of lifting up... the major resistance - the 'stuckness' of your object in the soil - has been overcome with less effort on your part." - Ellen Wells
This tool is especially effective for harvesting root crops like:
- Potatoes and sweet potatoes
- Turnips and garlic
- Other bulb vegetables
Safety Equipment
Following proper safety precautions is essential. Equip yourself with the right protective gear:
| Equipment Type | Purpose | Key Features |
|---|---|---|
| Garden Gloves | Protect hands | Water-resistant; puncture-proof |
| Knee Pads | Protect joints | Cushioned; adjustable straps |
| Steel-toed Boots | Shield feet | Non-slip soles; waterproof |
| Sun Protection | Prevent sun damage | Wide-brimmed hat; UV-resistant clothing |
Always ensure your safety gear fits well and is in good condition before starting your harvest.
How to Harvest Root Crops
Soil Preparation
Start by testing your soil to ensure the pH is between 6.0 and 6.8. Use a digging fork to loosen compacted soil - this improves air circulation and makes it easier to pull out the crops.
If you're dealing with clay soil, mix in washed quartz sand (0.6–2 mm) to improve drainage. Adding organic matter like well-rotted compost can also improve the soil's structure. For fertilization, apply a balanced 5-10-10 fertilizer at a rate of 2–3 pounds per 100 square feet, and work it into the top 2–3 inches of soil.
| Soil Type | Recommended Amendment | Application Rate |
|---|---|---|
| Clay Soil | Quartz Sand | 20–30% by volume |
| Heavy Soil | Organic Compost | 2–3-inch layer |
| Compacted Soil | Soil Activator | Follow package directions |
Once the soil is ready, you can focus on pulling the crops out safely.
Safe Pulling Techniques
Using the right tools and techniques can make harvesting easier and safer.
- Position Setup: Stand with your feet hip-width apart, facing the crops. Bend your knees to avoid straining your back.
- Tool Assistance: For larger root vegetables, try using tools like the EarthLifter Tool. Its 4:1 mechanical advantage makes heavy lifting much easier.
- Extraction Method: Hold the base of the plant firmly. Pull steadily while taking small backward steps and engaging your core muscles.
These steps help reduce strain and make the process smoother.
Post-Harvest Handling
Handle your crops carefully after pulling them out to maintain their quality. Gently brush off excess soil to avoid damaging the roots. Proper handling ensures the crops stay in good condition.
To get the best results:
- Remove rocks and debris right away. Younger roots often have better flavor and texture.
- Keep the soil moist during harvest, but avoid waterlogging.
- Use raised beds to improve drainage and reduce soil compaction.
These practices will help you harvest and handle your root crops effectively.
sbb-itb-1801a3a
Soil Care After Harvest
Adding Nutrients
Start by testing your soil to ensure it contains 5–10% organic matter in vegetable beds. Use compost made from plants (N-P-K 1.0–0.5–1.0) or manure-based compost for a nutrient boost. Spread a 2–3 inch layer of compost or aged manure across the surface and mix it into the top 8 inches of soil to replenish nutrients.
| Amendment Type | Application Depth | Benefits |
|---|---|---|
| Plant Compost | 2–3 inches | Provides balanced nutrients and improves soil structure |
| Aged Manure | 2–3 inches | Offers higher nutrient levels and retains moisture |
After this, clear out plant debris to activate microbial life in the soil.
Clearing Plant Debris
Research shows that about 75% of soil microbes on farms remain inactive due to a lack of food. To stimulate these microbes, apply a carbon-rich microbial food.
"By waking up and feeding your soil microbes a balanced, nutrient-rich meal, like PhycoTerra®, growers can break down crop residue faster, even with high-density crops like wheat and corn."
For effective debris management:
- Remove any diseased plant material.
- Let healthy roots decompose naturally.
- Apply 1–2 quarts of microbial product per acre.
- Keep the soil moist to support microbial activity.
This process sets the stage for better soil health in the next growing season.
Next Season Prep
Get your soil ready for the next planting season with techniques that promote long-term health. Loosen the soil to a depth of 8 inches to avoid compaction.
"Good garden soil develops over time"
Consider planting cover crops to:
- Protect against erosion.
- Add organic matter.
- Improve soil structure.
- Support microbial life.
Incorporate at least 1 inch of compost annually to maintain soil productivity. This helps balance pH levels, improves water retention, and keeps your garden thriving year after year.
Root Crop Storage
Storing root crops properly after harvest is essential to keep them fresh and usable for longer periods.
Cleaning and Curing
Harvest your root crops on dry days to make it easier to remove soil from the roots. Brush off the dirt gently to avoid damaging them. If washing is necessary, rinse with cold water, dry them completely, and trim the tops to about ½ inch. For potatoes, cure them by placing them in a single layer in a dark area at 55–70°F with 85–95% humidity for 2–5 days until the skins toughen. Once cleaned and cured, you can move on to setting up the right storage conditions.
Storage Requirements
Each type of root crop has specific storage needs to maximize its shelf life:
| Storage Type | Temperature | Crops | Storage Tips |
|---|---|---|---|
| Cold & Dry | 32–40°F | Onions, Shallots | Store separately from other crops |
| Cold & Moist | 32–40°F | Beets, Carrots, Parsnips, Potatoes | Maintain high humidity |
| Cool & Dry | 50–60°F | Winter Squash, Pumpkins | Ensure good ventilation |
| Cool & Moderately Moist | 55–60°F | Sweet Potatoes | Avoid temperature changes |
Check your stored crops regularly and remove any that show signs of decay. Potatoes should always be kept in complete darkness to prevent them from turning green. By meeting these storage conditions, you can significantly extend the freshness of your crops.
Preservation Methods
For carrots, refrigeration can keep them fresh for 2–3 months. Use airtight or vacuum-sealed bags to control humidity, and store them away from ethylene-producing fruits like apples and pears.
To preserve root vegetables even further:
- Place them in slightly moist sphagnum moss.
- Use ventilated plastic bags to regulate humidity.
- Maintain a stable temperature.
- Check humidity levels regularly.
Studies show that storing crops at 50°F instead of the ideal 32°F can cut their storage life in half, even with proper humidity. Consistent monitoring and good ventilation are key to successful long-term storage.
Summary
Safety Tips Review
Here’s a quick rundown of key safety tips for harvesting root crops.
Stick to safe practices to avoid injuries during harvest. Carry lighter loads and make multiple trips. Hold items close to your body and lift with your knees, not your back. Always wear proper protective gear, such as gloves, safety glasses, and earplugs when working with powered tools or machinery.
"No job is worth losing your life over, including farming and ranching. An ag‐related fatality can have a devastating impact on a community and a family."
― Angie Johnson, NDSU Extension farm and ranch safety coordinator
Use sharp tools like a Hori Hori knife for accurate digging and a fork for loosening soil. Turn off machinery before performing maintenance, and ensure safety features are clean and functional. Always maintain three points of contact when climbing on or off equipment, and honk the horn before starting any machinery.
These tips align with the ergonomic tools and careful harvesting methods discussed earlier.
Soil Health Tips
Caring for your soil after harvest is just as important as the harvest itself. Healthy soil sets the stage for a productive next season. Focus on these four principles: reduce soil disturbance, keep the soil covered, boost biodiversity, and maintain living roots.
Here’s a table of essential soil care practices to follow post-harvest:
| Practice | Purpose | Timing |
|---|---|---|
| Add Compost | Boost structure and nutrients | Annually after harvest |
| Plant Cover Crops | Protect soil and enrich nutrients | Within 2 weeks post-harvest |
| Reduce Tilling | Preserve soil structure | Year-round |
| Adjust pH | Optimize nutrient availability | As needed based on tests |
For the best results, regularly mix in organic matter and avoid working with wet soil to prevent compaction. Planting cover crops such as vetch, clover, or rye can shield exposed soil and sustain beneficial microbial activity.
"Enhancing soil health - in all its aspects, not just nutrient levels - is probably one of the most essential strategies for providing nutritious food to all the people in the world and ending the scourge of hunger and malnutrition."
― Building Soils for Better Crops, 3rd edition, 2009
Related posts
- 7 Essential Gardening Tools for Seniors: Reducing Physical Strain
- 10 Ways to Make Garden Maintenance Easier on Your Back